Hello Chobots!
I was going through some old pictures from Chobots, when I saw a big cake in a shape of a Chobot named 3looi.
Here it is:
That made me think about all the fun things we can make at our home, and I came up with an interesting idea. Chobots stickers!
You can decorate your room, notebooks, boxes, walls et cetera!
Putting these stickers does NOT harm any materials as they are NOT being glued to them. You can take the stickers off at any time without damaging the item that it is placed on.
Here is what you will need:
- sticky colored paper (the one on which you have to take the back side off to get to the sticky one. The back should be sticky on the WHOLE paper, not just the top part like on the sticky-notes)
- a pencil
- an eraser
- a ruler
- paper any size, depending on the width and height of the color paper
- crayons
- glue
- scissors
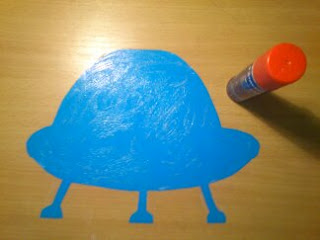
Today I am making Chobots spaceship sticker, but you can make anything else that you like!
Follow these steps to create your own Chobots sticker:
1. Place your sticky colored paper ( I chose blue one, you can choose any color you like) on your white paper to see how wide and high your drawing can be.
 |
2. Draw anything you like, I decided to draw a spaceship with Chobot inside of it.
3. If you want your sticker to be cool and to stand out, use crayons and color it with some bright colors!
4. Use scissors and carefully cut off your colored drawing from the white paper. For safety matters, ask an adult to help you.
5. Great! Now that you have finished your drawing, place it on top of the BACK side of the sticky colored paper (on the side that you take off to get to the sticky layer) and go over the outline using your pencil, so the shape of your drawing is on the back side of your sticky colored paper.
When you turn around the sticky colored paper it should look like this:
7. Put glue on the front side (blue side) of your sticky colored paper.
8. Place the drawing on the glued sticky colored paper and leave it to dry out for a few minutes.
(The side that is on the desk is the drawing and sticky color paper glued together, the one that is being taken off is the white back of the colored sticky paper)
10. Now you are finished!
If you have a drawing glued to the colored side of the colored sticky paper on one side, and sticky side of the colored sticky paper on the other, you have successfully made your Chobots sticker!
You can place it on the wall:
Or perhaps you can decorate your notebook:
You can also create different stickers! Take a look at the one I have made.
You can place them where ever you want, it's up to you to decide.
Don't forget, use your imagination!
That's all for now.
Have a good day,
Littlemiss.


That's very creative, if I have the time, then I will try it out!
ReplyDeleteAlready got my art supplies ready! Thanks for teaching us how to make stickers ima post mines here when im done! :D
ReplyDeletefinally i just did it !! but not my best :( hope you like it
ReplyDeleteC:\Users\user\Desktop\IMG-20130223-01836.jpg
thats the link
This comment has been removed by the author.
DeleteNo one can see the sticker, wwe.
DeleteOnly you can see it because it is the link to the picture from your computer. People can't see it since they don't use your computer.
I suggest uploading it on Tinypic.
~Dizzy